

How To Kill And Clean A Chicken Video
If you buy an item via links on this page, we may earn a commission. Our editorial content is not influenced by commissions. Read the full disclosure.
Do you have certain chores you do every fall that you like better than others? Well, I have a certain chore I must do every fall that I don't enjoy but it is a necessity none the less.
That chore is culling chickens.
You see, when fall hits I know winter isn't far behind. So it is important for me to decrease my flock. The reason I do this is because chickens usually lay less in the winter which equates to them costing more in food, but with less product.
Also, I've found the fewer birds the less chance you have of illness in your flock during winter. Plus, it equates to more meat for my family.
So if you have some birds that aren't laying like they use to then you'll want to know how to butcher a chicken successfully.
This is how you do it:
1. The Set-Up to Butcher a Chicken
Before you begin butchering any animal you need to make sure that you have the right set-up. What I mean by this, is you need water, a butcher station, and a sharp knife.
Though we use different set-ups depending upon the size of the animal, I have one butcher station that I use for small meat such as chickens and rabbits. (We use our tractor and boom pole to process deer and larger animals.)
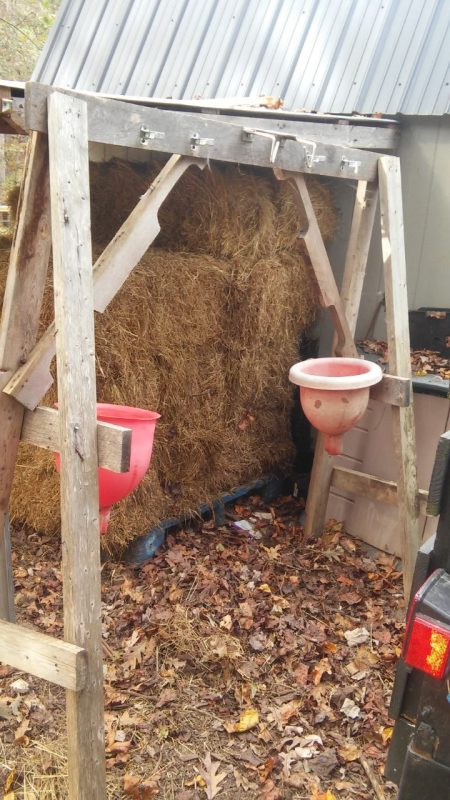
But for now, I'll walk you through my small animal station. We basically built a wooden A-frame.
Then we placed mop clamps at each end of the station. In the middle, we have these nicer clamps that came with our Hopper Popper. They work wonderfully with rabbits.
However, the mop clamps work just fine for butchering chickens.
Next, we placed two oil funnels under the mop clamps and attached them with a few screws to the frame of our butcher station.
Then we located our butcher station in an area that we could drag our water hose to in order to have running water.
And you could use a set like this one to butcher most animals you raise for meat. As you can see, building a butcher station doesn't have to be fancy or astronomical and it works quite well.
2. Catch Your Chickens
My chickens have a coop, a yard, and then a larger fenced in yard. They spend a lot of the year inside their coop and chicken yard.
However, we allow them out into the larger fenced in yard in later summer/early fall to help clean up some of the garden beds.But I usually put them back in their portion of the coop and yard before I cull them. The reason is so it is easier to catch them.
So if you have a way to close them off into a smaller area then this would be your best bet.
Next, I use a large net to help me to catch them one at a time. This makes running a chicken down so much easier.
3. Cull Your Birds
You have several options when it comes to butcher a chicken. Here is how you do some of them:
The Axe
Some people feel that butchering a chicken in this fashion is inhumane. I don't really confirm or deny these statements. In my opinion, as long as you see that the animal isn't physically suffering then you've done the job right.
So if you choose this option, you'll need a chopping block. You can use a large round stump. We have used this method in the past and took a large piece of firewood that we hadn't split yet and allowed it to double as a chopping block.
Then you'll need a quality axe. Be sure to sharpen your axe before using this method. The idea is to cull the chicken as quickly as possible so it is done as humanely as possible.
Next, you'll grab the chicken by its feet and it will instinctively stick its head out. It should only take one clean, swing to completely sever the head. After this, you'll notice that the bird will flop a lot. Don't worry, it is a natural reflex of its body. It is not alive when this happens.
So you'll want to place the bird on the ground and allow it to continue to flop until the body is done. You will have successfully culled your chicken after this.
The Hopper Popper

This is actually the method we use now. Once we purchased our Hopper Popper, we were sold. It is a great tool for culling all types of small animals.
So to begin, you'll just fit the bird's head through the slot in the Hopper Popper.
Then you'll grab its back feet and pull. You'll hear the bones in its neck popping. This is a good thing because it quickly dislocates the neck from the spinal cord inside the chicken. Which means death is quick and instantaneous.
Finally, the bird will flop as with the other process. You'll just need to lay it down and let it flop until its body is done. After that, you have successfully completed culling your chicken.
Slicing the Throat
This is another way of culling your birds. Basically, you hang them upside down, slice the throat, and then let the blood drain. Some people say it's a bit inhumane because it's slow death, but the chicken won't actually feel pain while they're upside down because they'll pass out in that position.
4. Plucking or Skinning
You probably wouldn't think that there would be so many decisions to make when it comes to processing a chicken.
But there really are lots of decisions to make.
So it should come as no surprise when I tell you that you have another decision to make in this process. You need to think if you want to skin or pluck the bird.
Here is how you do both:
Plucking Your Bird
A lot of people really hate plucking chickens. I am not one of those people. I don't necessarily enjoy it, but I don't despise doing it either.
So you begin by boiling water. I have an outdoor cook stove that I heat by wood. I'll get the fire going in it before I actually cull the birds if I'm planning on plucking.
Then you put a big stock pot of water on the stove, over the fire, or you could even heat it in your house if you'd like. Next, you'll dunk the bird in the boiling water head first (hold it by its feet) and allow the feathers to get wet. Don't hold it in the water for too long or you'll begin to cook the bird. A few dunks should do the trick.
Then you'll begin pulling the feathers. The scalding process actually helps the feathers be removed easier. Finally, you'll run a blow torch over the bird to singe any of the remaining hairs off of the bird.
If all of this seems like too much work, but you'd still like to have the skin of the chicken then you can actually build a chicken plucker and on a budget too. It will help take some of the work out of plucking a chicken.
Skinning Your Chickens
My husband is not a fan of plucking chickens. The smell gets to him. We actually skin a lot of our birds for his sake.
So you begin by hanging the bird by its feet on your butcher station. You'll need to thoroughly spray the bird down and make little slits around its feet and then start cutting down to its groin area.
Then you'll slice onwards toward its chest.
Finally, you'll pull the skin down towards its head and it should hang over its head kind of like a coat. That is all there is to skinning a chicken. It does require more cutting, but it is very quick.
And if you don't want the skin, then you might prefer to process your birds this way.
5. "It Takes Guts"
I think I've shared with you all in the past that I'm actually a homeschool mom. Everything we do turns into an educational experience.
So when I have to cull chickens, we use the step of gutting the chicken as a Biology lesson. It is interesting and brings a whole new level of understanding when studying anatomy, and you get to physically touch and compare organs.
But we'll move on to the actual gutting process. After you've skinned or plucked the chicken, you'll need to hang the chicken up by its feet (if it isn't already) and cut the chickens head off if it wasn't done so in the culling process. You'll just need a sharp knife and cut with some authority at the neck.
Then begin cutting downward from the chicken's groin area. You'll need to be very careful not to disrupt any of the organs, but be especially careful around the intestines.
As you slice downward, the organs will begin falling out. You'll need to gently cut them loose as needed and completely empty the inside of the bird. However, if you keep pigs or chickens, save all of the skin and organs in a bucket.
Then you can feed them as protein to these other animals.
Plus, if you have too much for one sitting, place them in Ziploc bags and freeze them for feed at a later date.
Finally, you'll complete this step by thoroughly rinsing out the bird. You'll need to make sure that water runs out of the neck of the chicken to ensure that you removed all of the organs and the bird is completely clean.
6. Prep The Chickens For Use
You'll need to prep your chickens before you can cook with them. You begin by quartering your birds, if you want to. I usually do just so they are easier for me to work with. It is easy enough to quarter them.
You'll just need to stick a sharp knife in the socket of the joint, and they come apart easily. Then you slice the meat lose, and your birds will be quartered.
Next, you'll need to place the meat inside cold water. I usually fill up a large soup pot and place the meat inside of it. Then I place it in the fridge for 24 hours. This allows for the blood to drain out of the bird which makes them more palatable.
Finally, you'll need to decide how you want to store the birds. You can freeze them by simply placing the whole bird or the quarters inside freezer bags. Then you press all of the air out of the bag and toss them into the freezer.
Or you can preserve the birds in mason jars. Here is how you can chicken. That is all there is to processing your freshly butchered chickens.
7. Use Those Birds
I thought you might need a few fresh recipes to help you use these birds after you put all of the effort into culling, butchering, and preserving them. So here are a few of my favorites:
Chicken Pie
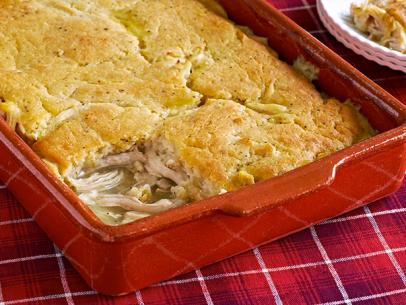
I'm a Trisha Yearwood fan anyway, but I love her recipe for this chicken pie. Anytime that I'm in a hurry and don't know what to fix, this recipe is a great go-to for me.
Plus, if you can your chicken it takes even less time than the recipe originally calls for because your chicken is already ready to throw into the dish.
View the Recipe >
Chicken And Dumplings

Chicken and dumplings is another great recipe I turn to when I'm in a hurry. I love the recipe by Hillbilly Housewife because she helps you make the most out of what you've got.
Plus, this site is actually where I first learned to cook. So believe me when I tell you she makes things easy for even the earliest of beginners. If I can learn to cook, anyone can.
View the Recipe >
Broccoli Chicken Fettuccini Alfredo
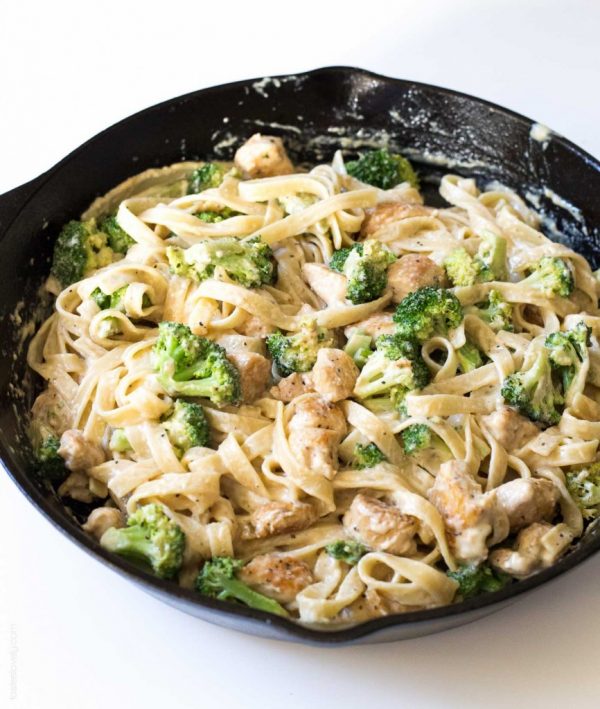
I love fettuccini alfredo. It is yummy and cheesy and please don't forget how warm and comforting it is. So it shouldn't be too surprising that I recommend this as one way to utilize your chicken.
Plus, it also contains broccoli which is a healthy food as well. You definitely need a bit of health food in the midst of all of those carbs and cheeses, but it is too good to turn down.
View the Recipe >
Well, that's the end of the road for culling, butchering, and processing your chickens. I hope that you've gained a little bit of wisdom from this post in how to butcher a chicken and feel a little more confident about culling your own meat.
Was this article helpful?
Yes No
How To Kill And Clean A Chicken Video
Source: https://morningchores.com/how-to-butcher-a-chicken/
Posted by: baldwinbusert1997.blogspot.com
0 Response to "How To Kill And Clean A Chicken Video"
Post a Comment